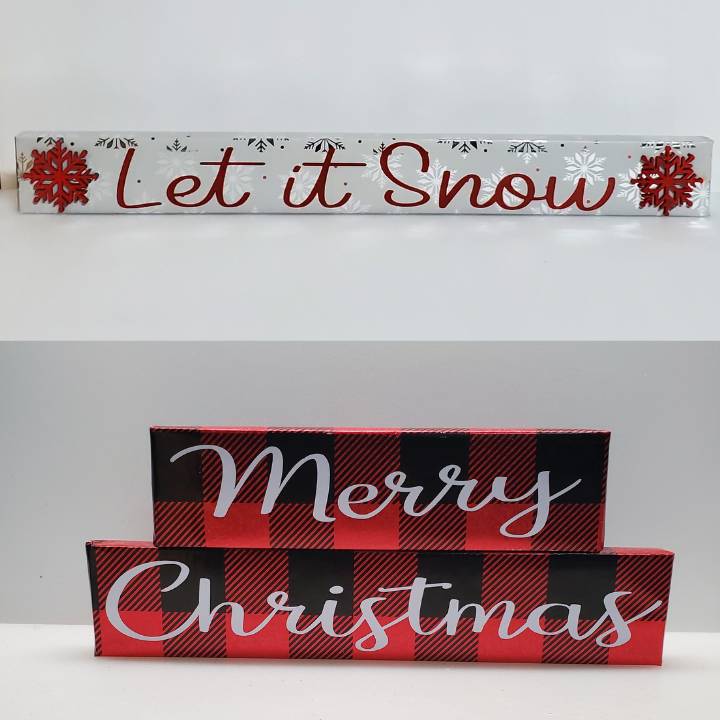
Cut the block, wrap the block with wrapping paper and add your quote. That’s it. That is how to make this Super quick and easy Christmas shelf sign. How easy is that? I actually made two signs, but the instructions are the same minus the cutting.

My local Dollar Tree had their Fall/Harvest decor on sale for 50% off last week. I found these Harvest and Pumpkin spice shelf signs and got a few of them. I knew I wanted to make just a simple Merry Christmas sign. No fuss, nothing super fancy or anything. I had just planned on painting one red and using my Cricut for the Merry Christmas.

Well, I decided I really wanted Merry sitting on top of Christmas, so I got out my miter saw to see if I could cut the block. And yay! You can totally cut them! They are solid all the way through. I didn’t measure, just cut maybe a third off the whole piece. So I painted the two pieces red and didn’t like how they looked so I was going to try to paint some kind of design on them. But I remembered I had bought a roll of buffalo check wrapping paper from the dollar tree and decided to try that.
At first, I tried to just put it on the very front of the sign and well, some wrapping paper is thinner than others and if you touch it wrong, it will tear. I had a huge mess with mod podge adhering really good in some spots and not so good in others. Then I would get a tiny tear in the paper and have to start again. After wasting a good bit of wrapping paper, I decided to just see how it looked if I wrapped it like a present.

And lo and behold! It worked! And it looked better than I had hoped it would. So I went to Cricut design space and made a Merry Christmas vinyl cut out. And then I cringed because I just knew the transfer paper was going to tear that wrapping paper all up. But to my awe, it didn’t. Really, I am still in awe that the wrapping paper did not tear at all from the transfer paper.
So then I looked over and saw the pretty snowflake wrapping paper I had and decided to make the Let it Snow sign also. Once again, I just wrapped it. No wasting of any wrapping paper for this one at all. Then I went back to Cricut design space and cut out the Let it Snow on red vinyl. Then I painted some wooden snowflakes I had on hand and added them to the ends of the board.

I think both of these signs are cute and they are really super easy to make.

I saw some of these Christmas shelf signs at dollar tree too. So I plan on getting more. You could make so many different shelf signs with quotes for other holidays or even just everyday shelf signs for your home. And knowing that you can cut them down if need be too? That is just an added bonus.
Please share your ideas with these shelf signs with me! Comments and suggestions are always welcome!
Looking for other fun, easy and customizable Christmas crafts, diys or decor?
Easy Dollar Tree light up Christmas Box
How to turn paint/ruler sticks into Reindeer names wall decor
Super quick and easy diy Christmas shelf décor sign

Cut the block, wrap the block with gift wrap and add your quote. That's it. That is how to make this Super quick and easy diy Christmas shelf décor sign.
Materials
- Shelf sign or piece of wood
- wrapping paper
- embellishments
Tools
- tape
- glue
Instructions
- If using gift wrap, wrap it around the block and tape it like a present. If your using paint, paint your wood block and let it dry
- Using transfer tape, attach your vinyl lettering to the block.
- Glue your other embellishments or decoration items to the block. And you're done!
Notes
If you're using wrapping paper or any other type of paper, rub your transfer tape on your clothing a few times. Getting your clothing fibers helps keep the tape from tearing your delicate paper!

[…] the Super quick and easy Christmas shelf sign I made a few weeks ago. You can check that post out here. It will take you longer to read this post and the instructions than it will to make […]